InTouch's import contacts tool is extremely beneficial and powerful to use as it not only saves you hours of manual work but it's quick and easy to do. Here's a list of tips to help you get the system and CSV file ready for those bulk uploads.
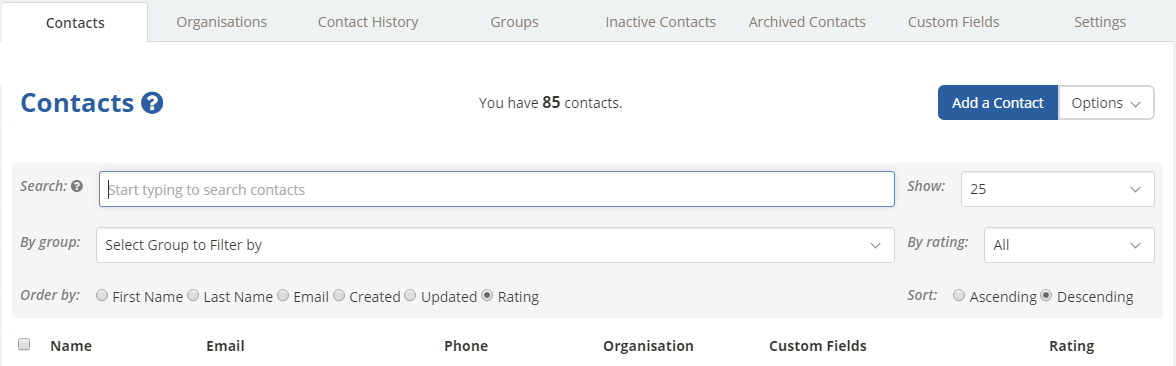
From this main page, simply click on Options then 'Import Contacts'.
Prepare, Organise and Tidy Up Your CSV File first:
We suggest to spend some time on checking the data ensuring it is well organised and tidy, so making sure that each field has its own column (separate column for First Name and Last Name) and insert a column header (title) in the top cell, so it allows you to clearly see when you are mapping across the information and ensuring you have the right fields in the system.
If you would like us to check through your file, before you upload it ... why not raise a support ticket and attach the file to us (or just a sample including your header row) and we will advise you accordingly.
So let's crack on with your import...
Click on the Upload File button then tick the box at the foot of that screen to confirm permissions:
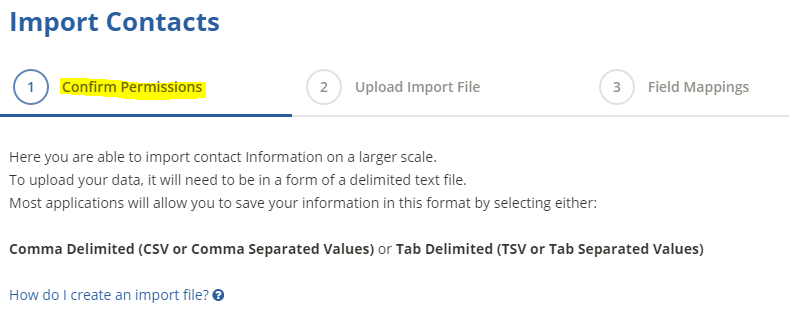
Now click on the Next button.
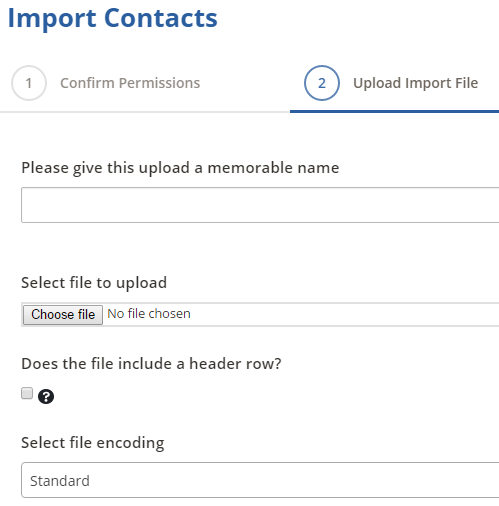
Now just enter a name for your import and choose the file that you have saved as a CSV file, and click Upload File. This will then take you to the Field Mappings step
Field Mappings
Here is a quick summary of our default contact fields already in your InTouch account:- (you don't need to create these fields yourself BUT you may need to create some additional contact Custom Fields first if they don't already pre-exist)
Import Contacts fields:
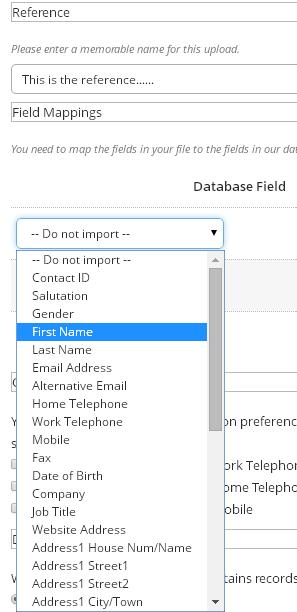

So just map across each of the fields in your file which you want to bring in:
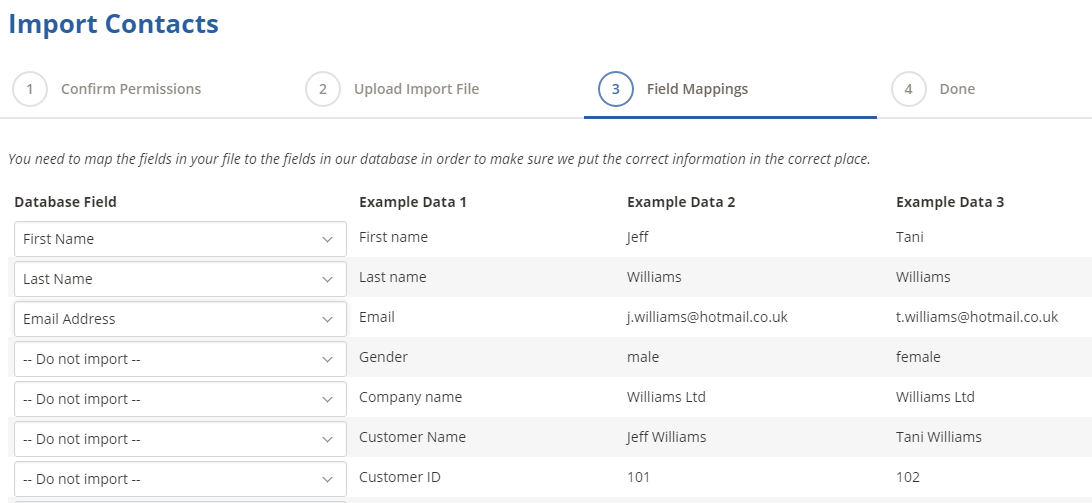
Perhaps you can't see what you are looking for or they don't match extra ones you have in your CSV file? Fear not, you are able to create Contact Custom Fields in the system before you do that bulk upload, as this will again save you time and prevent you having to manually update each of your contacts. These fields, will allows appear at the bottom of the choices in the field mapping part.
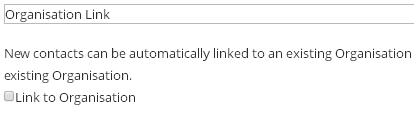
If you have Company in your CSV and ideally you would like to link those contacts to the details of those Companies, you can all you have to do is tick the box for Link to Organisation - so we always advise to do an Organisation Import FIRST!
Please Note!
The Company Name (in the Organisation import it's called Name) must match the Company field in the Contacts Import to allow it to successfully link all the information.
Updating, Maintaining with our Duplicate Processing
If you have already added a bulk upload to your contacts and wish to update them via the Import Contacts function or you have another spreadsheet of contacts and do not wish to override or miss out on their details being added to the system, you can!
When doing Update Imports of Contacts make sure that you fill in the Duplicate Processing section:

It is essential that you tick the Update option in order to avoid creating duplicate contacts if you are updating existing contacts. You then have the option to choose either Email address or Contact ID as the unique identifier. If all your contacts have an email addresses then its best that you choose the Email Address as the unique identifier.
Quick Note!
You can only use the Contact ID as the unique identifier if you have exported your data from intouch, which provides you with those Contact IDs. (then don't forget to match that Contact ID field across in the top section)
Using Groups to segment your contacts
This is a great part of the tool, as it will allow you to create a
group for each of the imports you do, so if you have a few spreadsheets of information that are specific to certain products, information or newsletters they have signed up to, you are able to upload them in different imports and then associated to the right group. Or you are even able to add them to the same group if you wish too... the choice is yours. (add to an existing group or create a new group)
You can add your Contacts to a Group, as part of an Import:

You can either choose to add all your contacts in your .csv file to an
existing group or a new group.
Communication Preferences
These will be added automatically for you e.g. for Email, SMS...
Don't want to wait for it to upload?
When you have completed your Import Contacts dataload actions, you can tick the option for being sent the email notification that your dataload has completed. This will allow you to get on and do other work rather than sitting and waiting for it to complete.
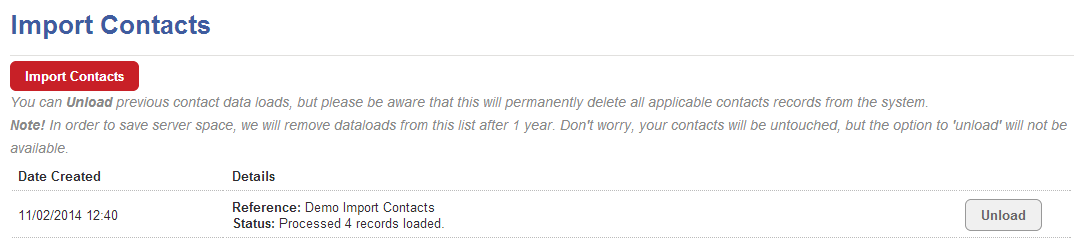
Once you've received that notification go back to your Import Contacts screen and you will see your results (an example is shown below). You can View Records from within the import result, should you need further details.
Here are some other guides which may be useful to you: