So, a Contact Dataload is another way to say a bulk upload in to the system. So if you have all of your contact information saved in a spreadsheet (CSV) then you are able to upload it in to the system.
Click here for a quick guide to give you all the essentials and info on how to save a CSV file and other import parts to Dataloads.
Quick Tip!
To save you time, we always suggest to add Custom Fields in to the system first. (These are basically a way which will help you report on your information and send really targeted emails to your customers)
Now to do these, all you have to do is go in to the Contacts Section within the system and click on Import Contacts (located in the Options menu):

Here, you will be given two options, Import Contacts or Import Organisations. So click on Import Contacts.Once selected you will be given information about the type of file it needs to be (CSV) and how to create it. Once you are happy and ready to proceed click Next.
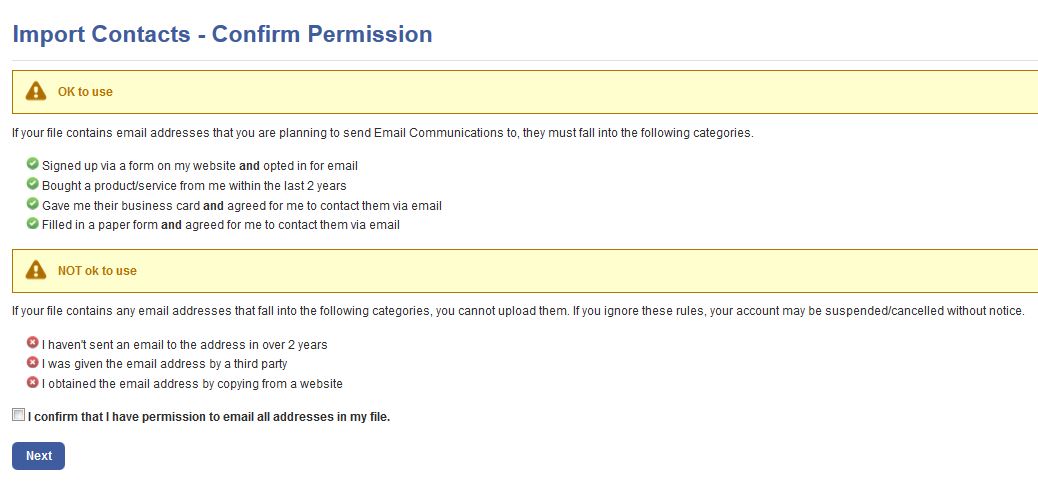
The next step is for you to state that you have received permission to contact these customers in the spreadsheet as shown below. If you match the above criteria then tick the box to confirm and press Next.
Now you are able to add the relevant CSV file that you wish to upload (just click Browse to find it), tick the applicable options and once you are happy, click OK, Upload my CSV file.
The next part is key to ensure that you are saving the information correctly within the system and ensuring those all important communication preferences are ticked.
To begin, add a reference name to it - this is for your own personal use to recognise what information you have loaded in to the system.
Field Mappings, select the relevant from the drop down options (these are the ones from the system) and ensure they match your spreadsheet options.

If you already have uploaded contacts in to the system and want to update them with this new data load - you can or if you want to ignore the duplication process as it's not applicable of course you can. This is where you are able to do it, so tick the box that is applicable to you:

You can even start to organise and segment your information here by adding these contacts you are about to upload to a group already in the system or add them to a new one. Either select the relevant group or Tick New Group and Enter the name:

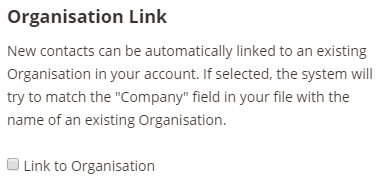
The last part Organisation - this is relevant if you have added a Company Name to your database and have select Company in the Field Mappings part of the upload, so if you have and want to link to an Organisation already in the system, just tick the box Link to Organisation:
Click here to find out how to upload an Organisation in to the system.
Once you are happy, press Import File - you will then be notified via email once it has been completed.