When setting up an automated campaign there is a lot going on on the screen, so let's break it down for you!
What's on the page?
The first thing you will notice on the screen is the message about your campaign status. There are two versions of this, firstly the one shown below which says that the campaign is not active - the alternative to that bar is one that says it is active and working as designed

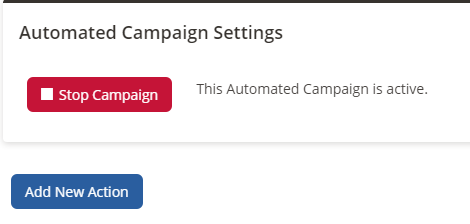
On each campaign you will also find a button saying "Add New Action", this button allows you to add in more action steps to the campaigns, both before and after it has been started.
Next up you will see the bar below, if you've added steps to the campaign

This bar contains everything you need to now about that step in the campaign, from when it will be actions
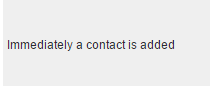
What type of action will happen on this step IE is it an email step, a task step, etc

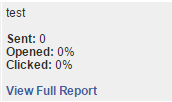
With the email steps, you will have the extra information of being able to see the reports, on the surface the system will display simple stats about what's happened with that step, however, if you click on the "View Full Report" you will get the normal in-depth stats that you get with stand-alone email campaigns.
The final part of each step is the further actions. In this case of an email you have: -
Edit, allows you to edit any details of the automated campaign step
Preview, allows you to see what the step is
Edit Content enables you to edit the content of your email step
Automation, this allows you to define what happens when someone clicks on a link within the email or opens your email
Delete - this does exactly what it says, it deletes the step.