Knowing your plans and your whereabouts on a daily basis is key to any business. Here we will show you how to use the calendar part of system so that you can add in your appointments, events, meetings and anything else that you might want to put in your calendar!
So let's get started!
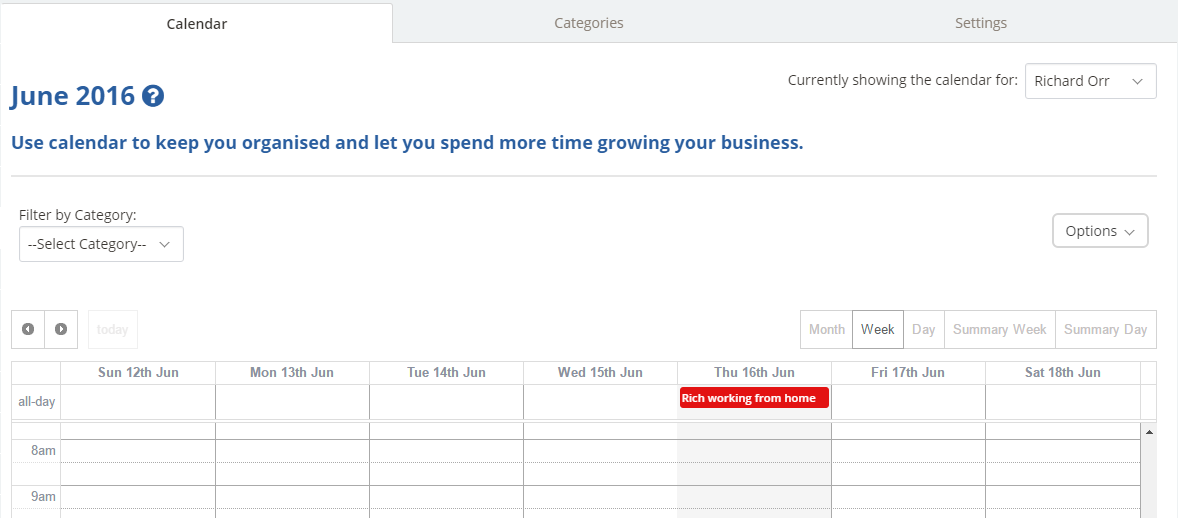
Within the Calendar section of the system you just need to simply take your mouse cursor and hover it over the time that you want to book the appointment for and click on the starting time cell.
This will bring up the panel that allows you to add in the basics of the appointment with the option to populate every detail you need.
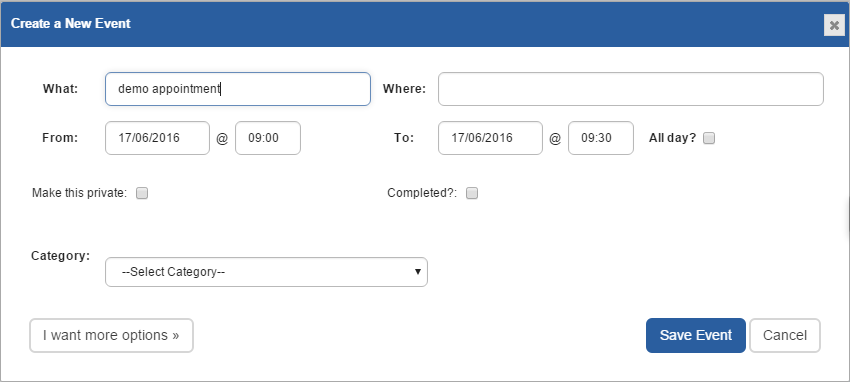
With the next pop up window you start to build the appointment for the time that you've selected. In this box, you can simply enter in the "What" section where you give the appointment a title. This is entirely up to you what you call it. You can also state where the appointment is going to take place and adjust the time accordingly, if you need to.
If you need to add it to someone else's calendar (another user) or even set it as a repeat appointment, then all you need to do is click on the "I want more options" text on the bottom left hand side of the "Create a New Event" box.
Here you will see the full form: -
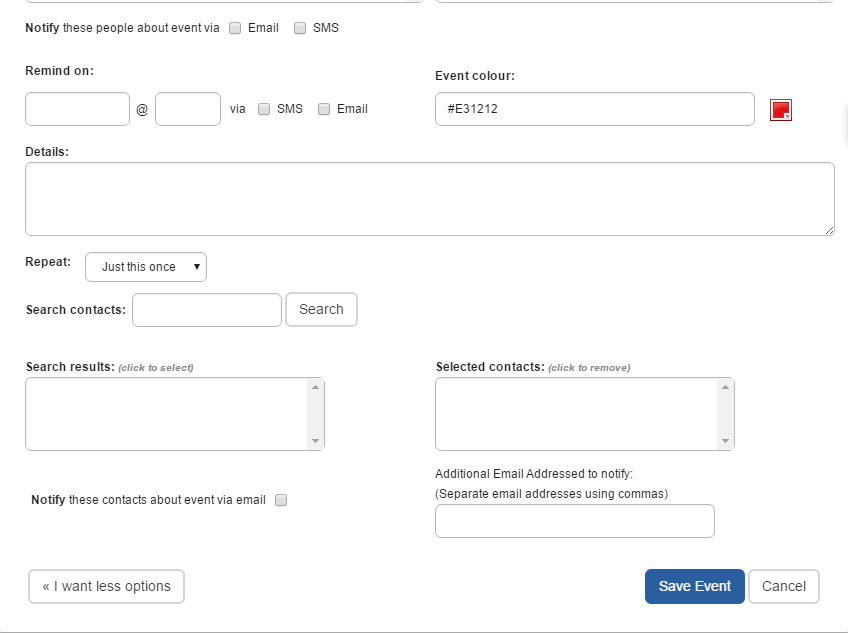
In this fuller form, you have the options to set up a reminder for the appointment, add it to another person's calendar, change the colour of how it will appear within the calendar, add in the extra details as well as even linking to a contact within your account.
It gives you more flexibility to include as much information as possible to the appointment.
Once you have completed these details and you are happy with the appointment. Simply click on the "Save Event" button located in the bottom right hand corner of the form.
You have now added an Event!