Email marketing is a powerful tool and a great way to attract, retain and present offers to your customers - InTouch offers you a simple and efficient way to do this.
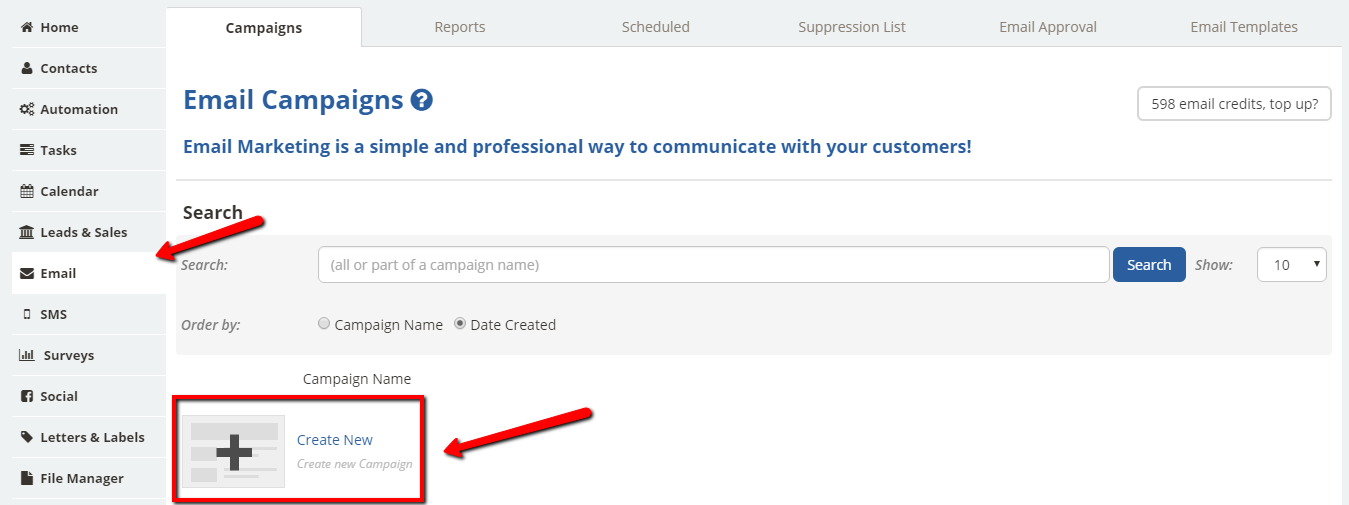
If you go in to the Email Section of the system (located on the sidebar to the left of the screen) and select Create an Email Campaign you are able to start creating your marketing masterpiece, your newsletter or your discount vouchers, appointment confirmations etc.
(1) Basic Info
Now, you will need to fill out the necessary fields... we have added quick hints of which each of the different fields are within the section and once you are happy just click Save & Proceed to Step 2.

We also thought we would highlight some important and interesting information to assist you with the creation of your subject line. Did you know...
"64% of customers opened an email because of the subject line" and there's a "22% increase in likelihood of personalised subject lines to be opened" (B2C.com).
So...we say be inventive and make it personal to be heard!
Click here for further information about subject lines and what to avoid.
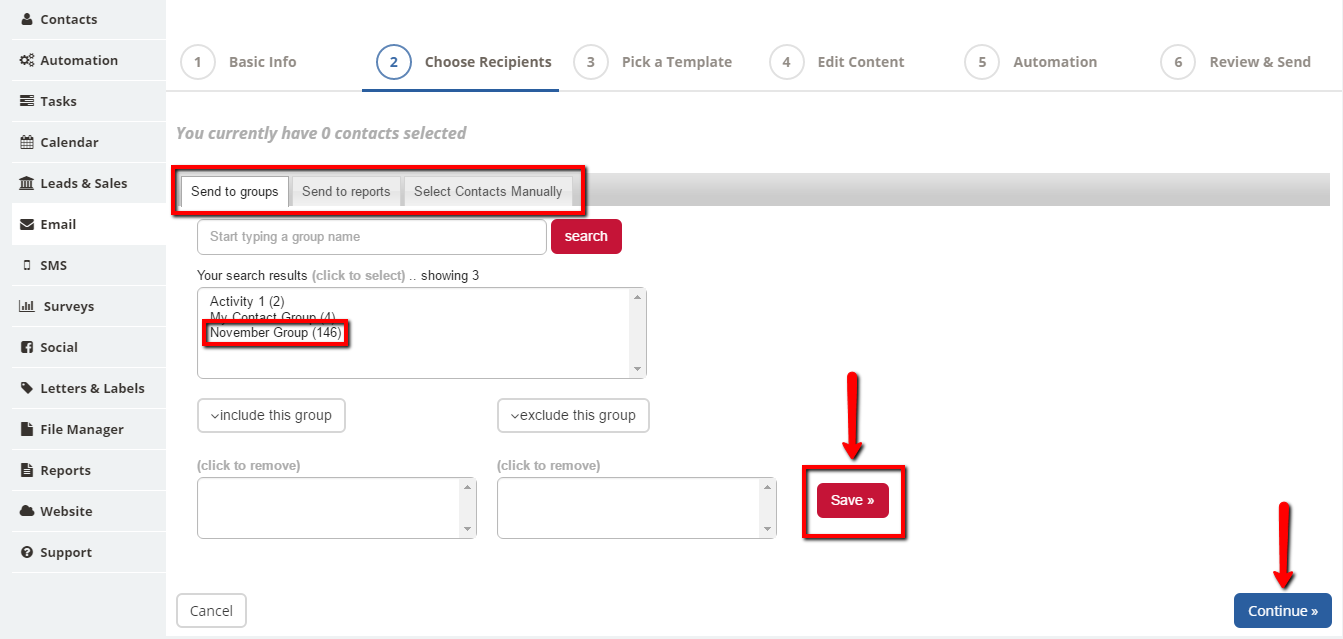
(2) Choose Recipients
Next you can pick your recipients for the campaign (or skip this step and add them later after you have made your email):
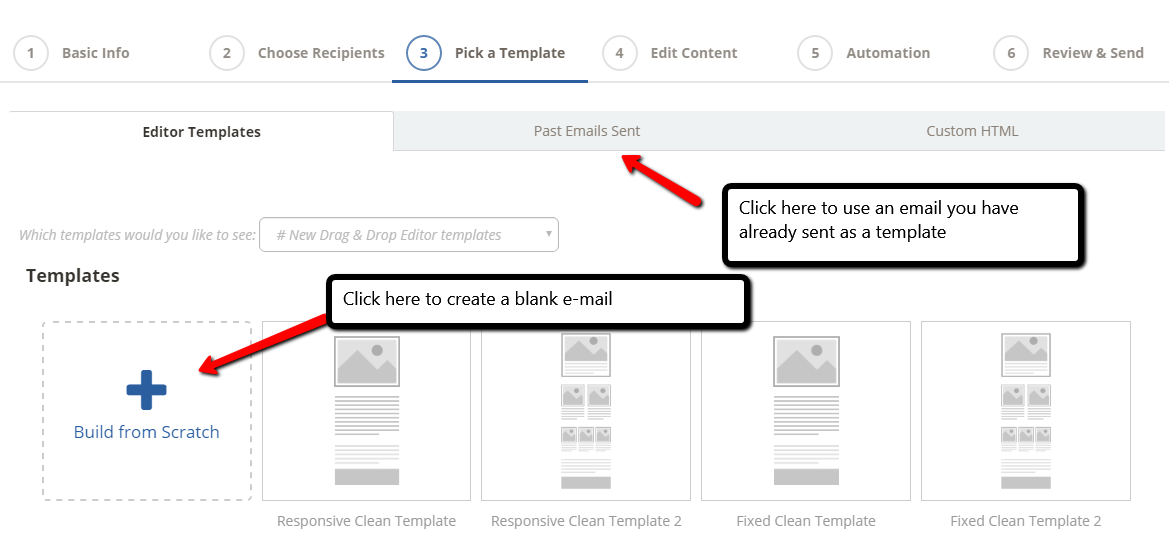
(3) Pick a Template
You now need to decide which template you wish to use, whether it's one of our editor templates, one that you have added in to the system or a free-form template (or even one you have saved previously), whichever one you want to use you are able to select it now.
Our Drag and Drop editor is our latest most advanced editor and is also the easiest to use. We highly recommend you use this one as the others are no longer supported by us but are still there for existing campaigns.
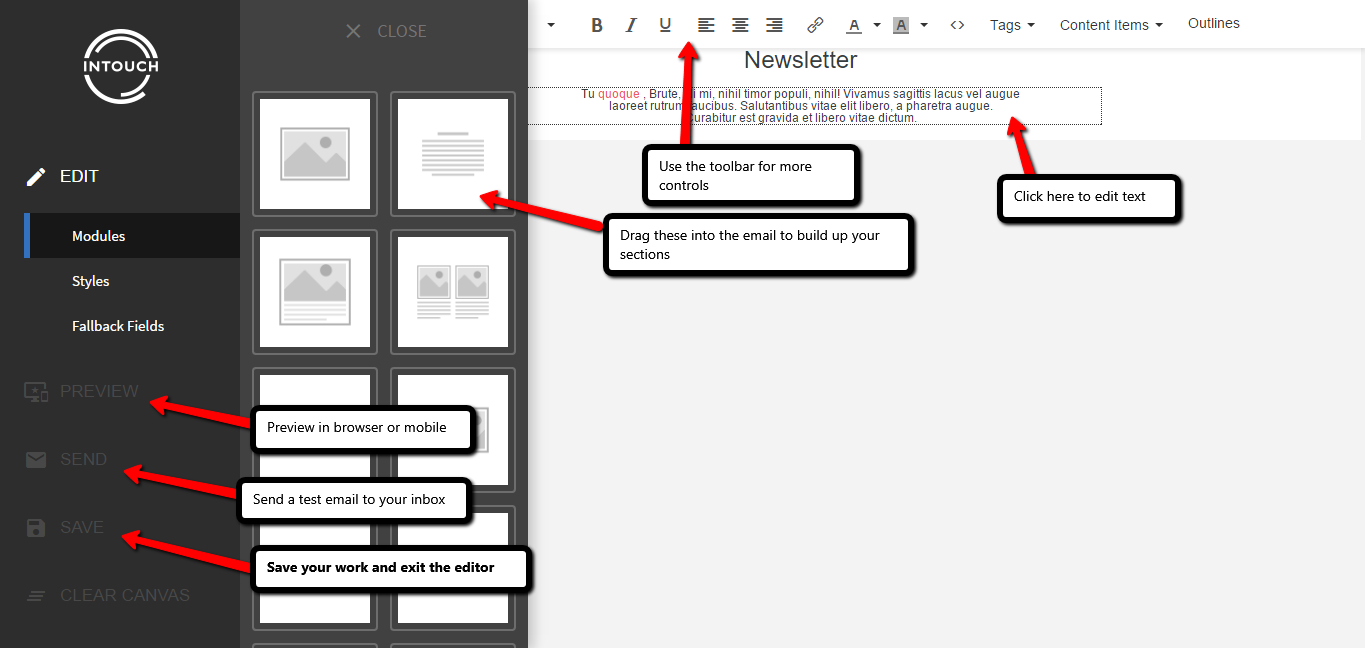
(4) Edit Content
Here are the main editor functions for building your email. When you're finished, press the Save button and then Save and Continue to exit out of the editor. If you want to save your work as a template for quick access later on, choose Save as Template first.
(5) Automation
The next step allows you to set automated campaigns to trigger if a contact clicks on a link or opens the email. Select the link and campaign and click the blue Add button to set this up. If you don't need this, just leave it blank and click Continue.

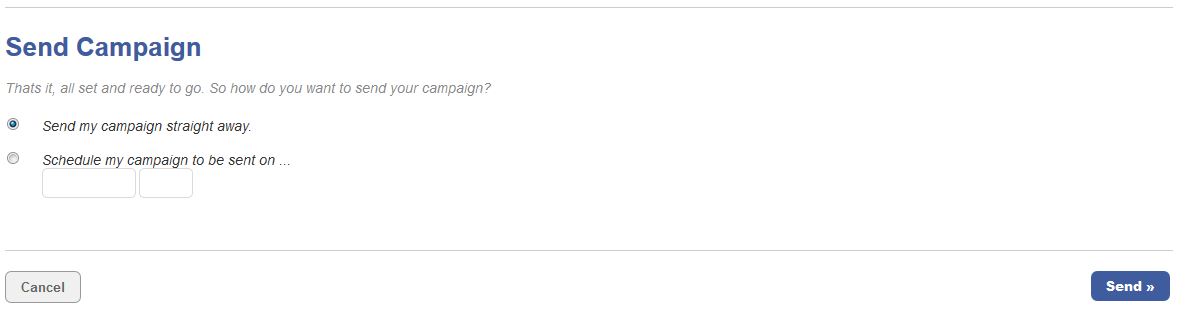
(6) Review and Send
You're nearly there and ready to send an email campaign, now you are able to review the basic information - from the subject title, the sent from email address and even able to go back and edit the content and preview the information.
If you wish to amend any of the information, all you have to do is press the Edit options and once you are happy, you're now ready to "Proceed to Sending Options".
To finalise the campaign and to send it, you have two options either "Send my campaign straight away" or "schedule my campaign to be sent on..." - the choice is yours but when have selected the relevant options press send.
Please Note!
Once you have pressed send and for whatever reason, you have decided you didn't want to send it or if there was a mistake in the email campaign, unfortunately in most cases we are unable to stop the campaign once it has started to send.
Further guides to help you with ideas for the creation of your email campaign
Fallback fields - why these are so useful
Update Forms - a great way to help keep your contact data up-to-date
Important and Success of Subject Lines
Boosting your Open Rates and our secrets to success!