Groups can be a very valuable way of differentiating your Contacts including differentiating and fine tuning your out-going communications.
This guide provides an overview of some of the most important aspects of Managing your Groups.
Add Contacts to Groups manually
Create Groups from Email Activity Reports
Select groups for out-going communications
Step 1 Contact dataloading
You can add contacts to either existing or new Groups during your Contact Importing. This is really important, as you may be able to segment your contacts onto different .csv files and then load each import into a new group from the outset. This will save you much time compared with dataloading all your contacts in from one data .csv file and then adding your individual contacts to groups manually.

Step 2 Add Contacts to Groups manually
It is worth noting that aside from your contact imports it is very straightforward to add individual contacts into groups. Add the new group name first in your account, the group names will appear on the drop-down when adding in a contact from their Groups tab within their contact record:

Step 3 Create Groups from Reports
A great piece of functionality is the ability to create a Group from Reports e.g. from a Custom report just click on the Create as Group hyperlink:

Step 4 Create Groups from Email Activity Reports
Another great function is being able to filter your recipients' Activity within Email Reports and then selecting all and adding to a Group.
For example click on the Activity tab, set the Open Count filter key to "greater than zero", select all, then click on the "Add to Group" button at the foot of the screen.

Next choose whether you want to add to a new group or an existing group:

You have now created a Group which contains those recipients who have opened your Email campaign. You can now build further with these active recipients, with your future marketing.
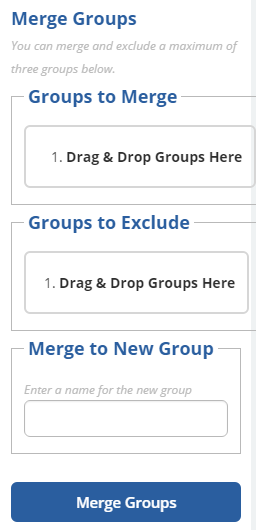
Step 5 Merge Groups
Don't forget that you can Merge Groups to create a new group: Just go via Contacts > Groups and the Merge Groups is on the right of your screen.
Just drag and drop the groups into the appropriate box:
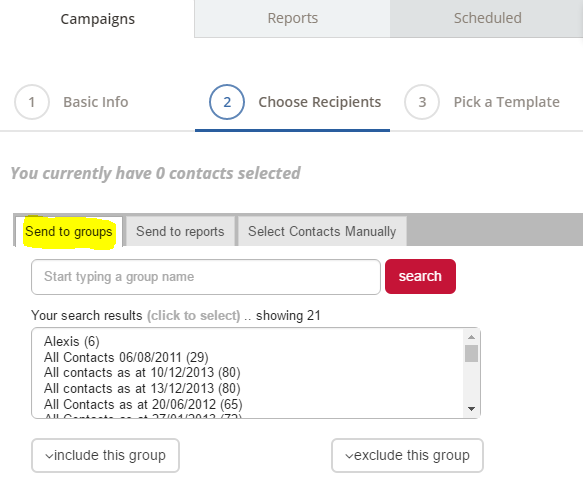
Step 6 Select groups for out-going communications
A major benefit of having groups is to be able to select groups for out-going communications e.g. Email:
Make sure that you have contact preferenced (aka communication preferences) your contacts within your groups.
If you need to contact preference a group just go to Contacts > Options > Batch Update Contacts