Not only are you able to create a mailmerge, but you are also able to produce the labels for the envelopes!
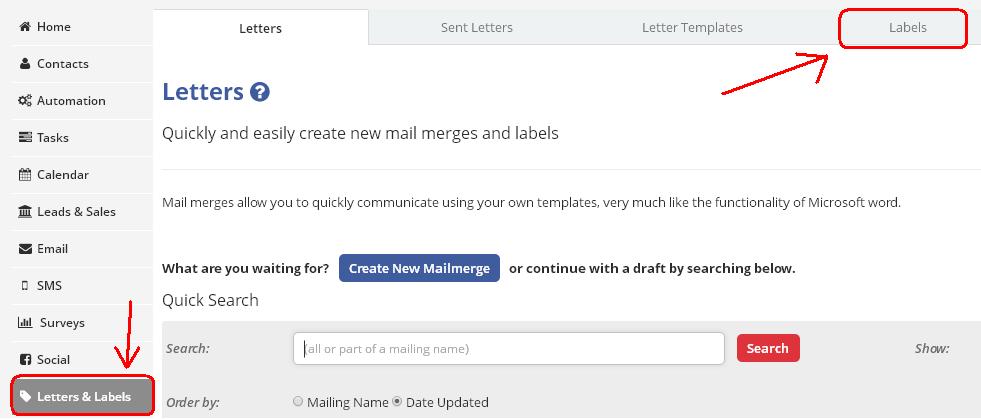
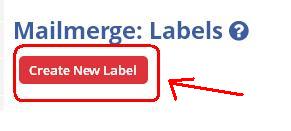
Go to Letters and Labels > Labels > Press Create New Label
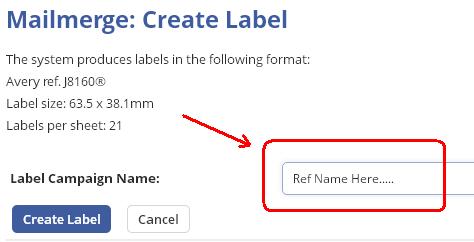
Now add a reference name for these labels and begin the process of creation.
(Please note: the relevant label size that you need to add is stated - you aren't able to configure the system to print to a label that you want to use)
Once you have pressed 'Create Label' all you need to do is select the relevant contacts you would like to use by clicking on the select button highlighted on the right.
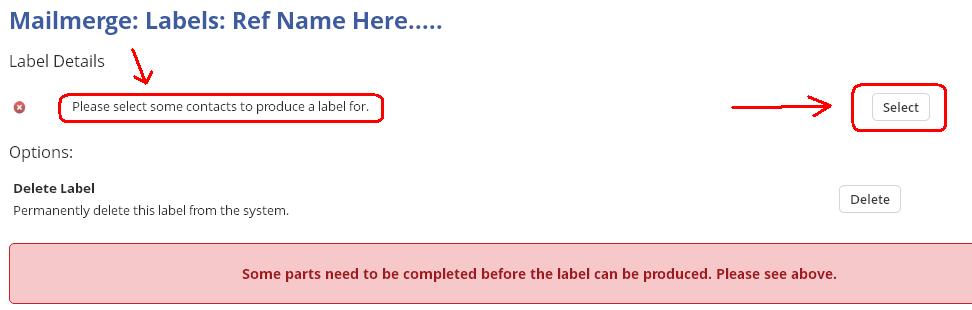
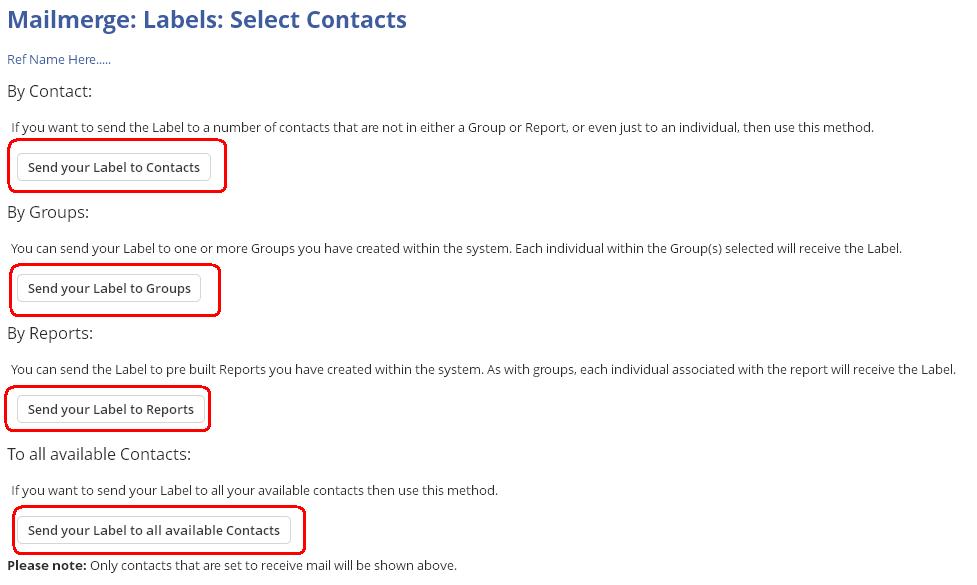
Once you click on the select button to select your contacts, you will have the choice of either sending your label to all available contacts, groups, reports or individual contacts.
Once the selection has been made, on the final page simply click on 'Finish & Return' to complete the process.
Now all the vital things are in place, so now all you have to do is 'Click here to Download/ Print'. Once all is printed and you are happy with the labels that have printed, click Finalise the Label - this will add the information to the contact Communication History.
Important Note/ Friendly Reminder
Vital information is that the system is designed to print to an Avery label – Reference J81608 – Size 63.5 x 38.1mm – 21 labels per sheet – 3 across and 7 down. Of course, you are able to use any brand - just make sure the measurements match (you aren't able to print to any other size or configuration)!
If no contacts appear in the selection area for the label, you will just need to add their communication preferences to their contact record (Please refer to Helpful Hints series: Contact Preference)