If you have lots of contacts on your Facebook Page that are interested in your organisation, well why not add a Web Form to it? This will allow you to collect passing traffic that would like to have further information, offers, newsletters or just emails from you.
Here's how to...
Sign in to your Facebook account and type in Static HTML: iframe tabs and click on Go to App
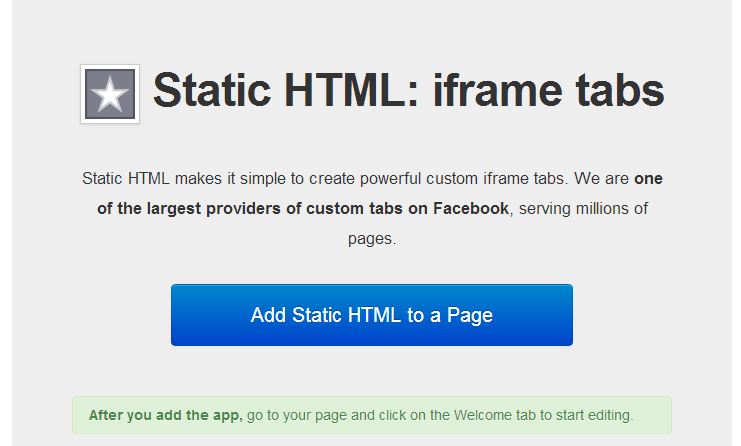
Click on Add Static HTML to a Page
This will then allow you to select from a drop down option, which Facebook page you would like to add it to > then click on Add Page Tab.
Panic not, it hasn't disappeared you are now probably seeing your Facebook account that you have logged in to, all you have to do now is go in to the Business Facebook Page that you selected in the abovementioned step.
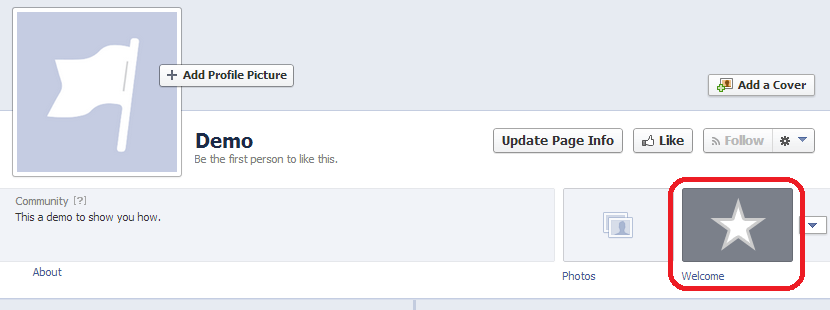
In your Business Page look for the circled box and click on it.
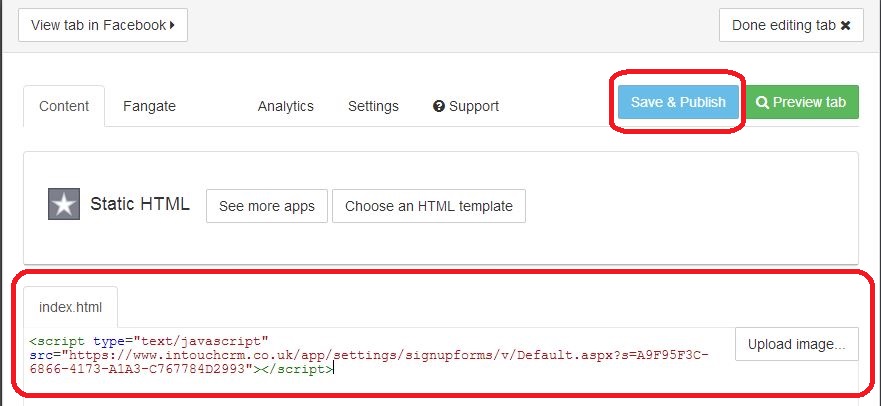
Then click on Edit Tab, this will then allow you to enter your HTML coding for your Web Form that you have created.
Now in our system, all you have to do is go to Setup & More > Web Form and find the relevant Web Form and copy that coding to allow you to paste it in to the index.html for your Web Form for your Business's Facebook Page. Once it has been added, press Save & Publish to complete this process.
Please Note!
This is one of many apps that you are able to use to create the Web Form for your Business's Facebook Page. Here are a couple more examples of apps you could use... Clixeo and Woobox.