Switching from Salesforce to InTouch can be achieved in a few easy steps as detailed below:
| Step 1 Export your contact information from Salesforce:
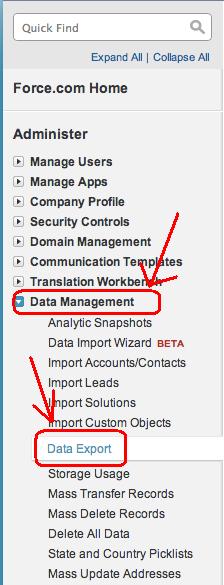
If you are a Salesforce user, you can export all data (contacts, accounts, notes, etc) or only specific types (i.e. only contacts, only accounts, only notes etc). To export your contacts, tasks, appointments, and notes from Salesforce follow the steps below: 1. Login to Salesforce.
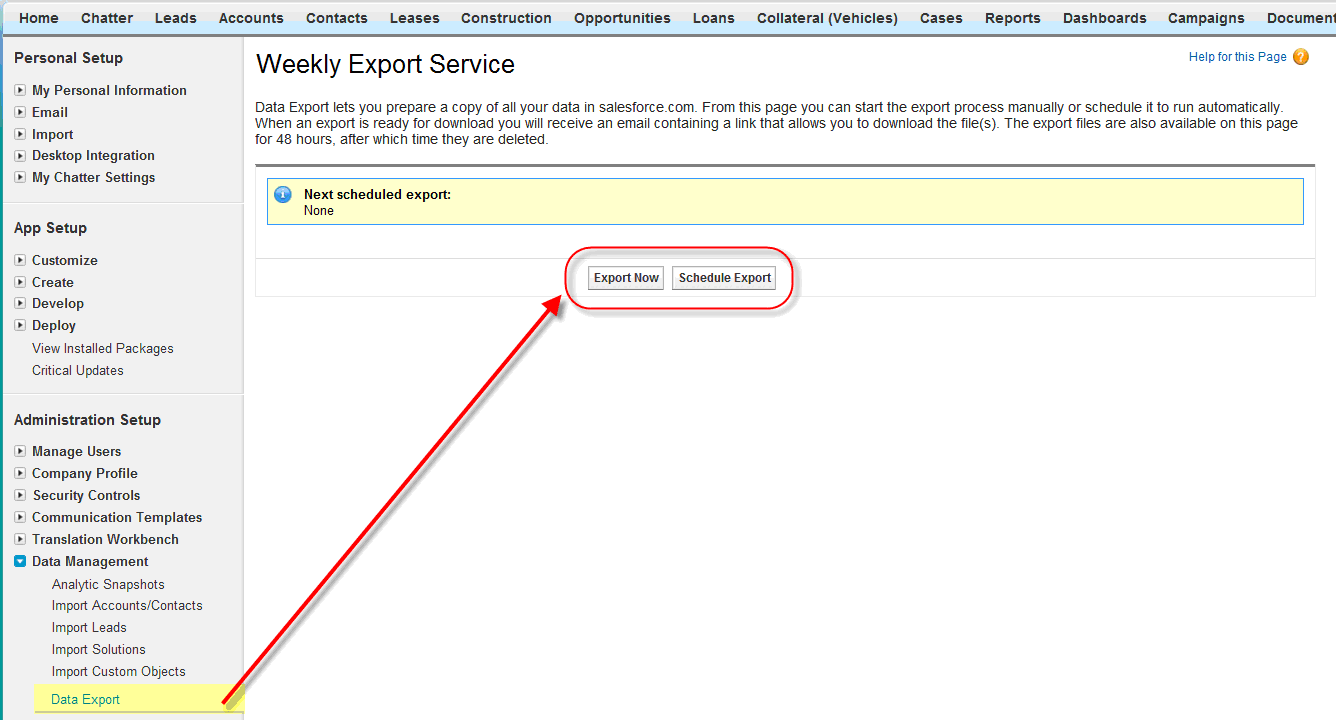
This option is only available if a week has passed since your last export. The Schedule Export option allows you to schedule the export process for weekly or monthly intervals.
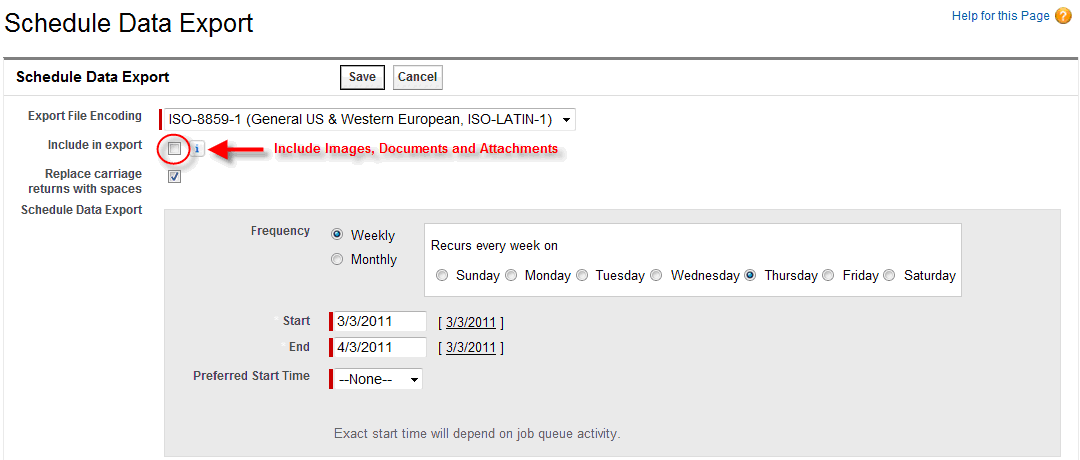
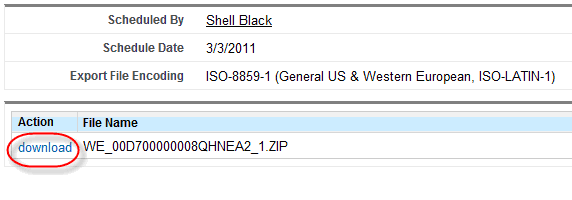
5. The export File Encoding drop-down by default is set to General US & Western European. 6. Select what data you would like to export by checking the appropriate boxes, and click Start Export or Save. 7. Salesforce will queue up the now send you an email. Click on the link provided in the email to download your files. 8. Click download within the Action column on the export page.
Step 2 Complete the basic set up routine for InTouch including adding an email address and name for Email approval. This will enable you to start sending Email campaigns quickly. Step 3 Create your custom fields in your InTouch account in preparation for your imports. You have the options of both Organisation custom fields and Contact custom fields. To view the default Contact custom fields already in InTouch view this guide: http://support.intouchcrm.com/articles/contacts/import-contacts-guide and to prepare for creating your custom fields view this guide: http://support.intouchcrm.com/articles/general-system/types-of-custom-fields Step 4 Now you’re ready to import your Organisations and Contacts. To import your companies as Organisations, action a Business dataload: http://support.intouchcrm.com/articles/organisations/helpful-hints-series-business-dataloads and to action your Import Contacts: http://support.intouchcrm.com/articles/contacts/import-contacts-guide Step 5 There, that’s it! You are now ready to use the great functionality which InTouch has and it is right at your fingertips! Why not start by creating your first email campaign and send it out to wow your prospects / customers. Don’t forget that you can segment your contact database by Groups and Custom Fields and you can run Reports to filter on that powerful information! When you’ve created your first Email campaign you have the sending options of : All Contacts Individual Contacts Groups Reports Visit our Support Site for more guidance: http://support.intouchcrm.com/ |